Mastering Crisp Paint Lines: A Step-by-Step Guide for Flawless Edges
Mastering Crisp Paint Lines: A Step-by-Step Guide for Flawless Edges
Prep Work: Setting the Stage
Achieving clean lines starts with meticulous preparation:
- Clear furniture from the room or cover items with drop cloths.
- Remove electric switch cover plates and apply painter’s tape to base molding, window trim, and door frames.
- Cover light fixtures and ceiling fans with plastic bags.
- Secure floor drop cloths using painter’s tape to prevent slips.
From Top to Bottom: Layering for Success
- Start with the ceiling: Extend paint 3 inches down the walls. Let it dry completely.
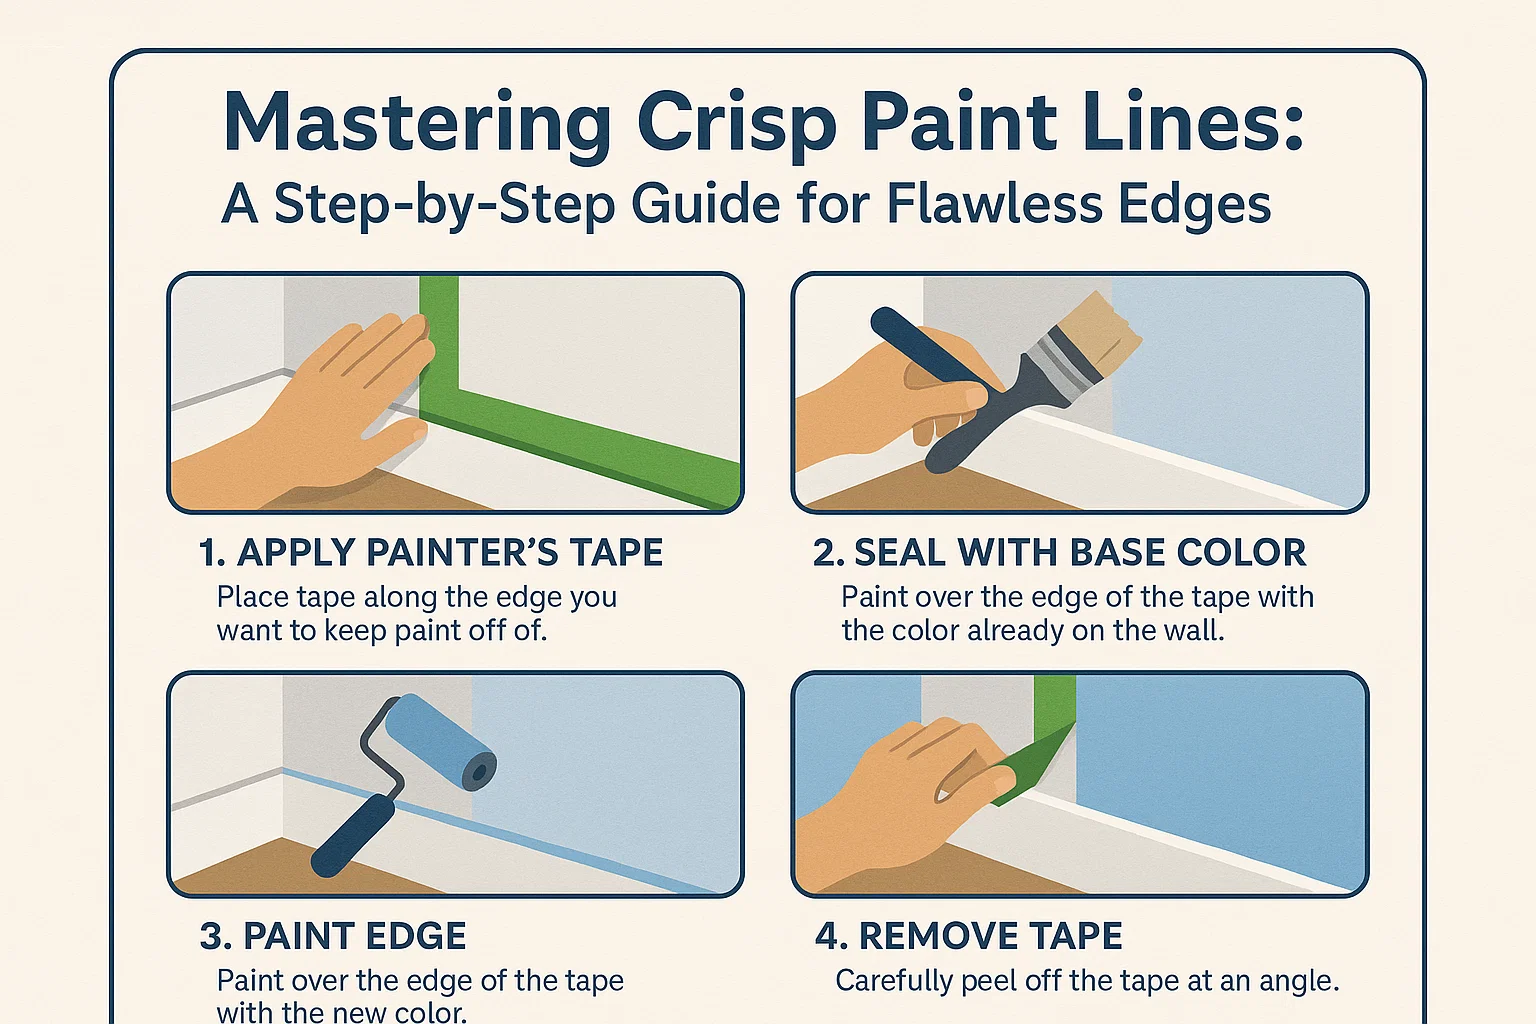
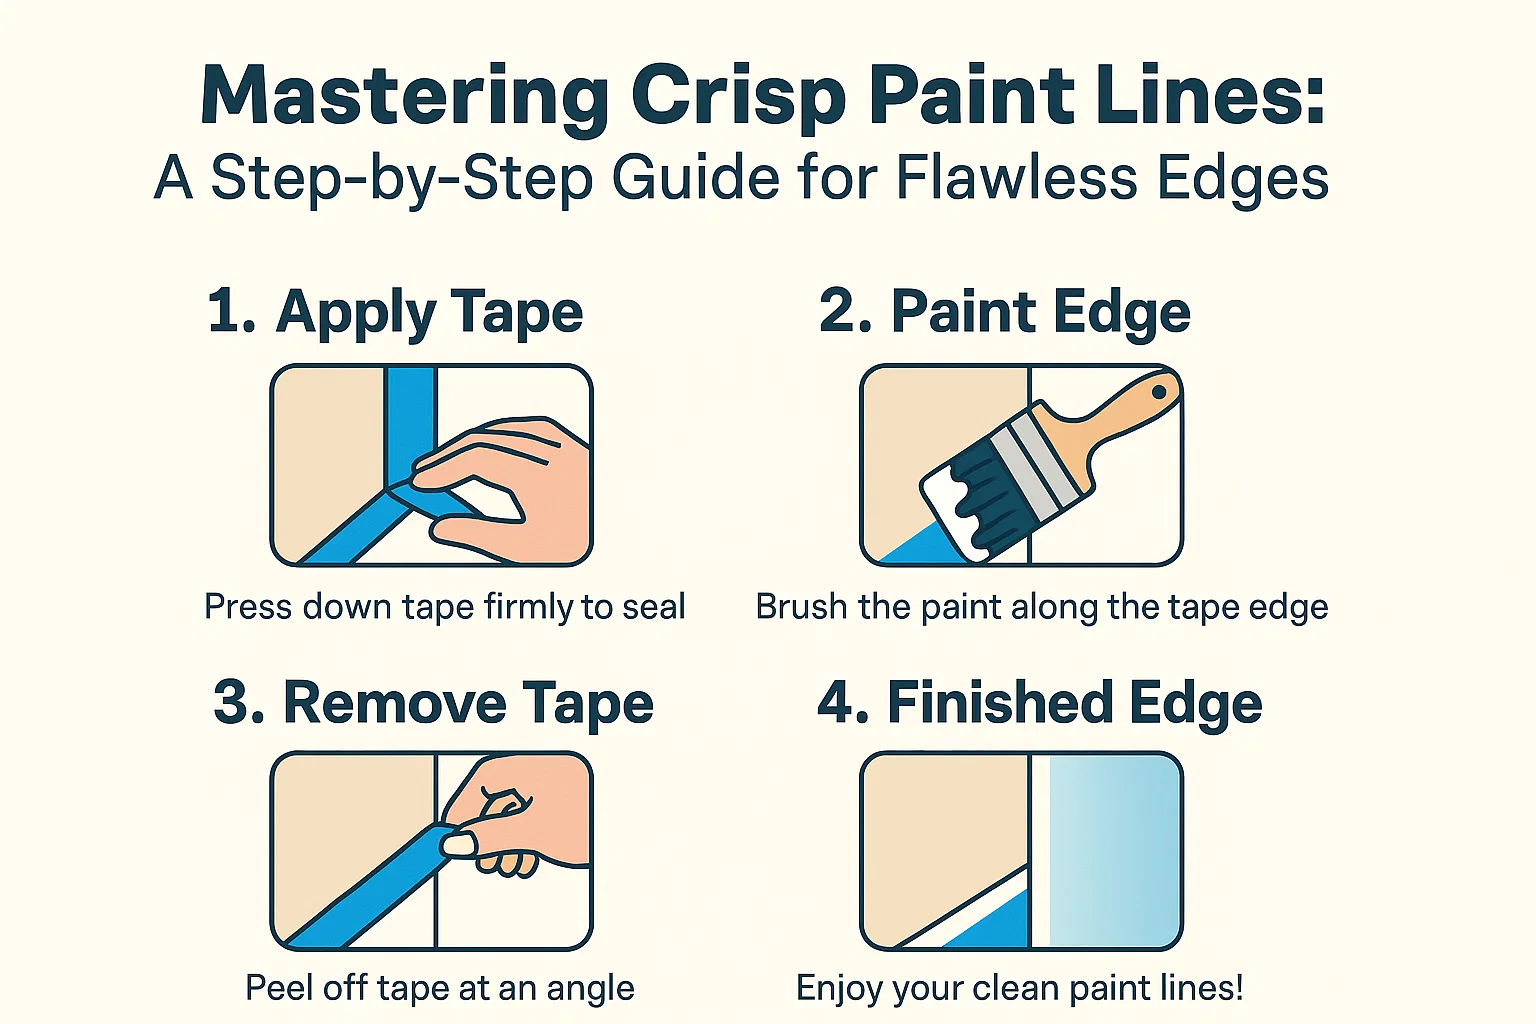
- Apply ceiling tape: Line the ceiling perimeter, pressing the tape edge firmly against the wall.
- Seal the barrier: Use a small brush to paint along the 3-inch wall section up to the ceiling tape. This fills texture gaps and blocks future seeping.
Flawless Finish: Timing is Everything
- Paint walls while the ceiling dries, stopping short of the top 3-inch section.
- Once the ceiling is dry, finish painting the walls, overlapping the taped edge slightly.
- Pro tip: Remove ceiling tape while wall paint is still damp for clean lines.
With these steps, you’ll transform your space with sharp, professional-grade edges—no stress, no mess!